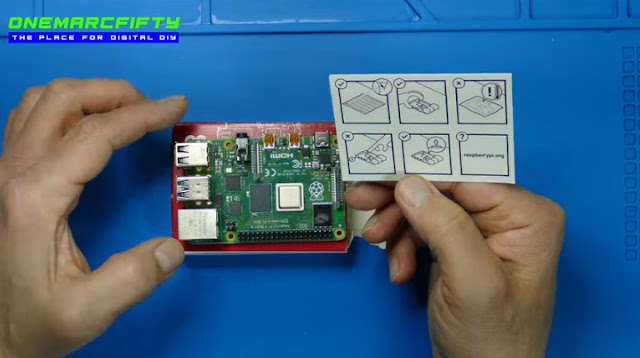
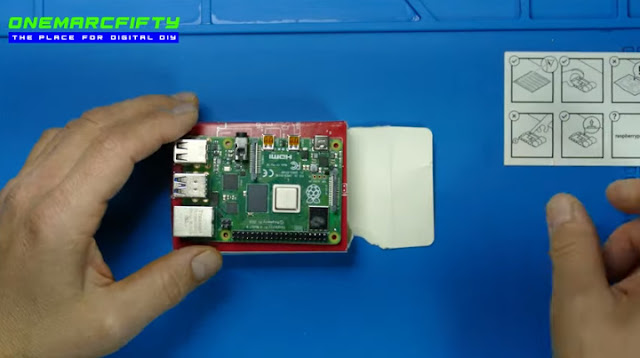
When you unbox the pi – and that’s tip number one – be extremely delicate and only touch the metal parts. Don’t touch the printed circuit board. Electric discharges might destroy the pi if you do so. And if you take it out there is this little notice telling you exactly that – but a second too late probably because you have already taken it out of the box, right ?
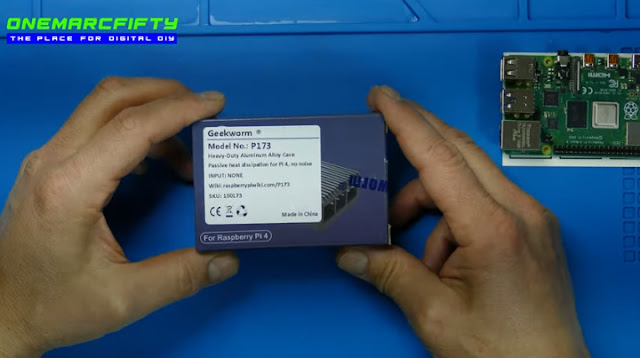
Here’s the case which I bought – and that actually takes me to tip number 2 : Do buy or make a case before you unbox the pi. You don’t want to ask yourself the question where to put it once you unboxed it. That question should really be answered before. The case which I have bought from Geek worm is made of aluminum and that’s my personal tip number 3 – buy a metal case. Better heat dissipation and less risk of static electric discharges.
The case which I have bought has a couple of nice features such as a lot of openings at the right places. That brings me to tip number 4 – decide whether you want to add possible extensions such as display or camera and buy a case with the corresponding openings. You don’t want to find yourself in a situation where you would have to buy a second case or drill holes into it etc.
We had just spoken about heat dissipation and yes, parts of the Pi can become hot and heat needs to be taken care of – that case has these posts here which fit nicely onto the parts which can become hot. My personal tip number 5 – go fanless. A fan will constantly generate noise and might break or fail.
Prefer metal, that won’t fail. Never. The Geek worm case comes with those heat contact pads. It’s a bit of fiddling to put them on the posts of the case but ultimately I like that solution because it makes sure that there is a good and smooth contact between the case and the circuits. Another thing that I like with this case is the fact that it is fixed with screws. Might just be me but I really prefer screws over any snap in mechanism. Generally speaking tip number 6 – make sure that the case can be opened at any time in case you want to add or remove stuff.

There’s two more tips here – Tip # 7 - buy or find a charger or USB C adapter. The new pi needs a USB C charger end hence your old mini or micro USB chargers won’t do. Tip #8 – if you want to connect it to a screen, then plan for those micro HDMI cables because the HDMI connectors have changed as well.
Last tip on the hardware #9 – when you operate the Pi make sure that you don’t turn it upside down because that way the heat would stay under the printed circuit board and could not dissipate. So make sure you note upside and downside of the case. Great, so as we could see there are a couple of things to keep in mind if you are buying a Raspberry Pi 4 – plan for some additional expenses such as case and power supply.
The price point of the Pi 4 is quite high so you don‘t want to break it with an electric discharge the day you unbox it. Next, let‘s have a look at how we can image the Pi and breathe life into it. We will use the new Raspberry Pi imager. I am doing this under Linux but the tool is available for Windows and Marcos as well. You do however need a little micro SD card and a reader for it. Either with an SD adapter if your laptop has an SD card reader slot or use one of these USB readers here. The raspberry pi foundation has issued a software called the Raspberry pi imager.
That software can be downloaded from their website and will effectively make previous solutions such as etcher or dd redundant. Browse to their website and download the tool for your operating system. It’s available for Marcos, Windows and Linux. Once you launch it you may choose which Operating system to install. My advice is to use the raspberry pi OS which is debian Linux in fact.
That’s the most flexible one. It lets you chose an SD card to write on and once you click on write then you need to confirm that the card can be overwritten and once I click on yes then the imaging process starts. Under Linux and presumably the same under Windows – the Operating system will ask you if it is OK to access a disk drive directly.
That’s OK of course, we don’t have a choice really. The imaging process depends on the speed of your SD card reader, the USB and the card itself. I’ve accelerated this in the video . It took actually 5 minutes in reality. Great, the card is imaged and before we put it into the pi we need to activate ssh access. By default this is disabled for security reasons. In order to activate it, we just need to create a file in the boot partition of the SSD card. The file content doesn’t matter, just the file needs to be there.
I am doing this in the shell, but under Windows you could do this with Explorer for example. Perfect, I can now remove the SD card, put it into the Pi and connect the Pi to power and the network. I connect to it using ssh. The default user is called pi and the default password is raspberry, all in minor letters. The first thing we need to do after the first login is really to change the password – guys, this is important. We don’t want millions of devices on this planet with the same user and password. That opens so many doors for the bad guys. Please do change the pi password.

In fact - if I had had an hdmi cable when I set up the pi then I could have done this easily using mouse and keyboard because the locale and the password change are the first two questions that pop up when you first launch the pi desktop I think that was a great move of the vendor to unify the way you image the pi – there used to be so many different tools for Linux, Windows and Mac and it required a lot of research to find the right one.
But SD cards have never been intended to be used for a large number of reads and writes. They wear out – that means that they become faulty once you do a certain number of I/Os on them. No issue if you turn the Pi on for a couple of hours every now and then or if you are not running any applications on it. But as soon as you want to install let‘s say a database or home automation software on it then this will become an issue. The card will break maybe after a week or should be next a month or two. There is a solution however – and that is using a Hard disk in a USB case – preferably an SSD and boot from the disk rather than from the SD card. Here is how:
I am logged into the pi with ssh and the first thing that I do is update the repositories by typing apt update. Next I want to upgrade all software components. In order to do this I type apt full-upgrade. I had already done this before so in my case there is nothing more to update. The next step is to launch the firmware updater by issuing the rpi-update command as root.
Now – be aware that this will bump you to the latest Linux tree but I haven’t seen any real issues with this. So I confirm the question by typing y for yes. The download starts and depending on your bandwidth will take a couple of minutes or so. Nice the upgrade is finished, you will need to reboot the pi. So I type sudo reboot in order to do this. A minute later it comes back and I can reconnect. Note the updated kernel version number.
Next we need to upgrade the eeprom, so the firmware of the pi. This is done with the rpi-eeprom-update program. Quickly checking the possible options. We want the a option to install the latest boot loader and also the d option in order to use the default boot loader config. So let’s quickly hack that in -as you can see in my case the boot loader is already up to date.
At the time of making this video the most recent one was as of September 2020. If you had had any changes here then you would need to reboot at this point. Let’s just launch raspi-config quickly and check that the USB boot options are enabled. Under advanced, find the option Boot loader Version and make sure that it’s set to E1- use the latest boot ROM software. Next find the Boot order option and check that it’s set to USB boot.
Great – the next step is to connect an SSD or hard drive to the USB port and actually copy the SD card image over to the SSD drive. The tool is called pic lone. If you are connected to a display and a keyboard then you can select the SD card image clone utility from the desktop. That’s the easy way.
There is a hard way as well if you don’t have a display and if you can only access the Pi over the network. When I recorded this video I did not yet have an HDMI cable so I needed to find a way to launch this graphical tool over ssh. That’s not trivial because pic lone needs to run as root but over ssh it needs to use my unprivileged X11 connection. But first let’s test X11 forwarding.

I just need any X11 app and therefore I install the x11-apps package. Just to show you how this is meant to work – here we have clock, a graphical clock or how about oxeyes, the two eyes which follow my mouse cursor – so X11 over ssh is working. Now this would not necessarily work if I launched things as root or with sudo because X11 could not connect to my display. Therefore I need to copy the .Authority file with the MIT magic cookie over to the root user’s directory. Faith list shows me the cookie and I can add it as root using faith add. And – today – I can now launch x applications as root – which you only should do if you really need to.
Now if I just launched the pic lone utility with sudo it would not see the disk devices so I actually need to use dbus-launch. Again, if you are in front of the pi and have it connected to a keyboard and screen that would be much easier. Thought I’d show it in case you ever need to run a graphical application over ssh as root. Once pic lone recognizes both the sd card and the SSD drive then I can start the cloning process. Pic lone will copy the partitions and their content and also resize the partitions to the maximum possible extend. You can see this here – the SD card is 32 GB in size, the SSD is 64 GB in size. Note that both drives have the same identifier so we should never have both in the pi at the same time at boot time really.
Rather than using the reboot command I just shut down the Pi because I now need to remove the SD card – it won’t be used any more. In the future, I will only boot from the SSD drive. Let me ssh back in and launch the raspi-config tool once more because there are two more things which I want to fix quickly.
Even though I have no screen attached to the Pi I want to set a default resolution because some applications read out that setting and won’t work properly if it is not set. Last but not least I want to get rid of these locale setting warnings – so I just give the system a default locale. I’ll generate the UTF8 locales for German and English and chose a default locale. That should avoid the warnings in the future. That’s it for the housekeeping. All good.
Awesome, now our Pi boots from the SSD and we can go ahead and install software on it. In one of the next episodes we will have a look into Graham Garner’s and Andreas Spies ‘ IOTStack project which delivers a complete stack of home automation software and Dockers. We will also install Webmin on it so that you can do all the system related tasks from a Graphical Web interface rather than from the command line.
Before we wrap up let‘s quickly summarize and have a look at the expenses. We have the Pi that costs roughly 65 $ plus the power supply for 10 $ plus the case for 10 $ and you also need an SD Card and potentially a reader for 15 $ . If you want to use it as a server then plan for an SSD plus a USB case. Again at least 50$. so the whole thing sums up to as much as 150 $. Please just keep this in mind when you are planning on buying and using a raspberry Pi.
Some of the Kits that are sold in the internet contain a lot of accessories which you might never use. But the case and the charger are – in my opinion – a must. Cool, guys – that concludes today‘s episode I hope it was useful for you and I hope you liked it.


Comments
Post a Comment